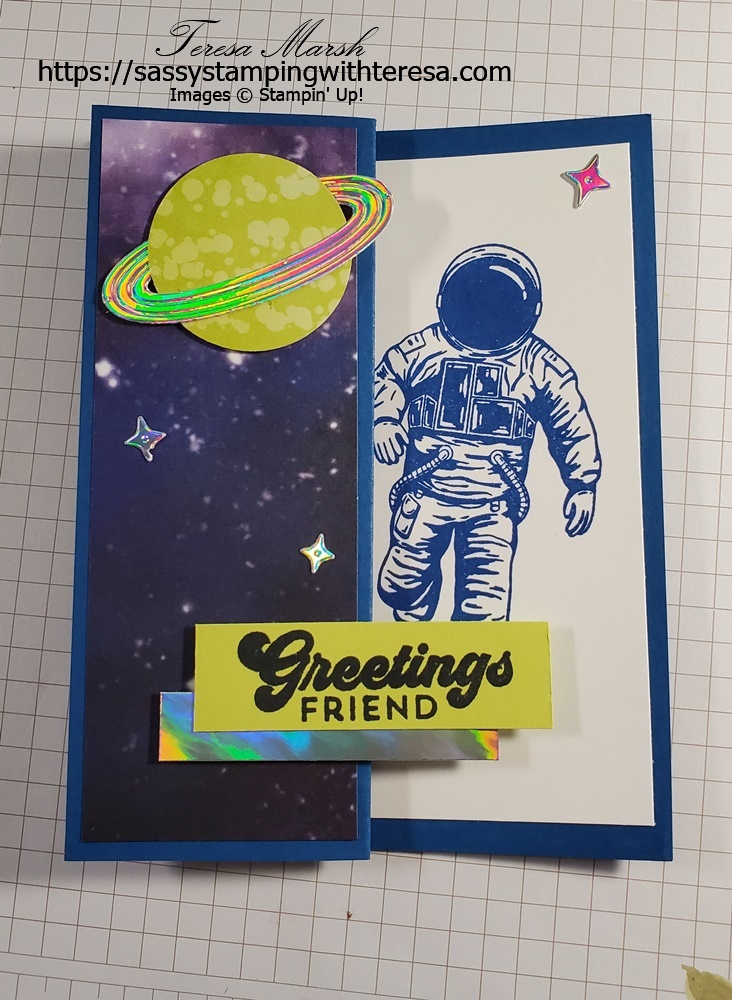
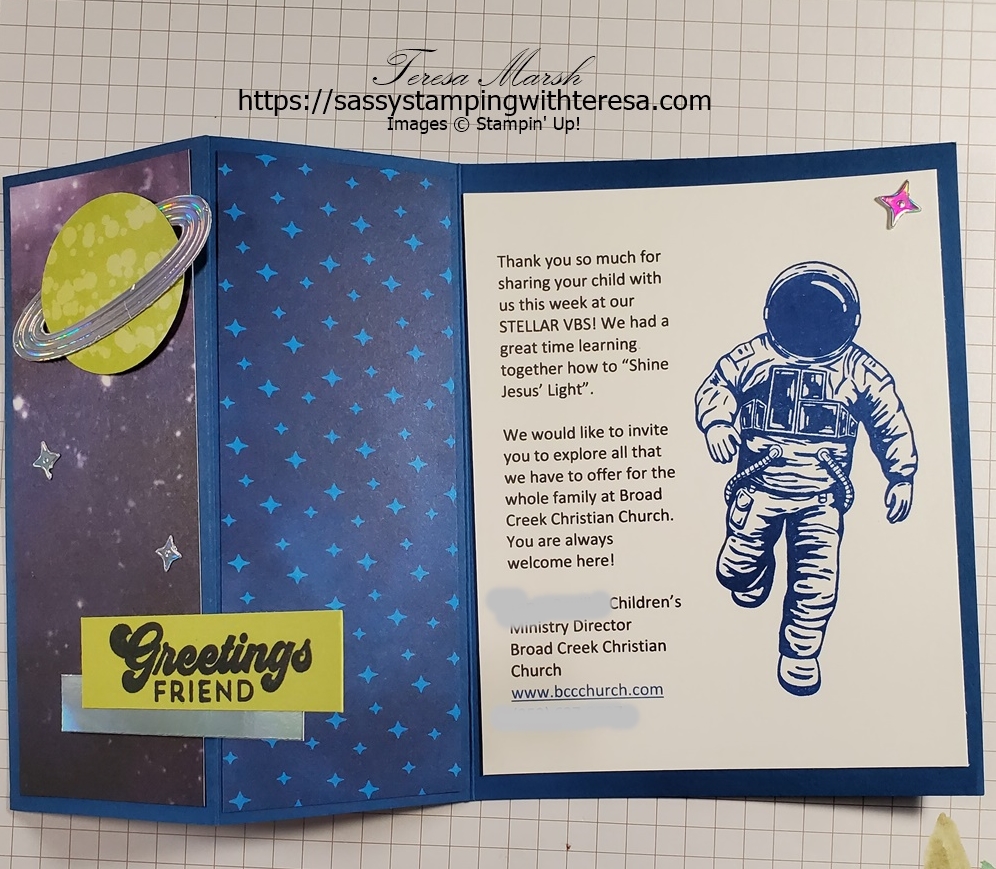
As an active participant in a summer program at my church entitled “Stellar”, I was absolutely thrilled to see the Stargazing Suite in the 2023-2024 Annual catalog and very excited to use the products toward that program. One of the ways that I used this suite was to make cards to thank the parents for sharing their child with us for the week. You can easily make these cards for all sorts of occasions – birthday, congratulations, or even anniversary cards.
Steps:
- Using Blueberry Bushel 8 1/2 x 11 card stock, score the full sheet on the short side at 4 1/4 and again at 2 1/8. Rotate the the full sheet and then cut at 5 1/2 to create two card bases to facilitate making multiple cards. Fold at the 4 1/4 score line and in the opposite direction at the 2 1/8 score line, creating a fold-back half front.
- Choose a sheet of the Stargazing Paper and cut a strip 1 7/8 inches wide. Cut the strip in two 5 1/4 inch lengths. Adhere these to the 2 smaller sections of the base, using one side then the other of the printed paper.
- Choosing a patterned sheet of DSP, die-cut (or punch) a 1 1/2 inch circle to be a planet (I chose a lemon-lime twist print.)
- Cut a strip of card stock at 3/4 inch x 2 1/2 for the greeting (choose paper coordinating with the planet color). Stamp your greeting.
- Choosing a sheet of the Holographic paper, cut out 3 stars and a “planet ring” (the smaller of the two in the die set.) Also cut a strip 1/2 inch by 2 1/4 inches; adhere this to the bottom of the card stock piece with the greeting.
- Cut basic white paper at 5 1/4 x 4 inches for the inner portion of the card. Stamp this to the right with the focal stamp (astronaut or space ship) using Blueberry Bushel ink and adhere to the card base on the larger portion.
- Adhere the planet and the “planet ring” together and attach to the upper left portion of the folded back card front. Adhere the greeting portion to the lower part of the front piece, being careful to attach it only on the left portion so that it sticks out over the inside portion, but is not attached.
- Add the stars in appropriate places. (I added the larger one on the upper right inside portion and the other two on the front fold.


Supplies Used

