Liberating floral elements for embellishments
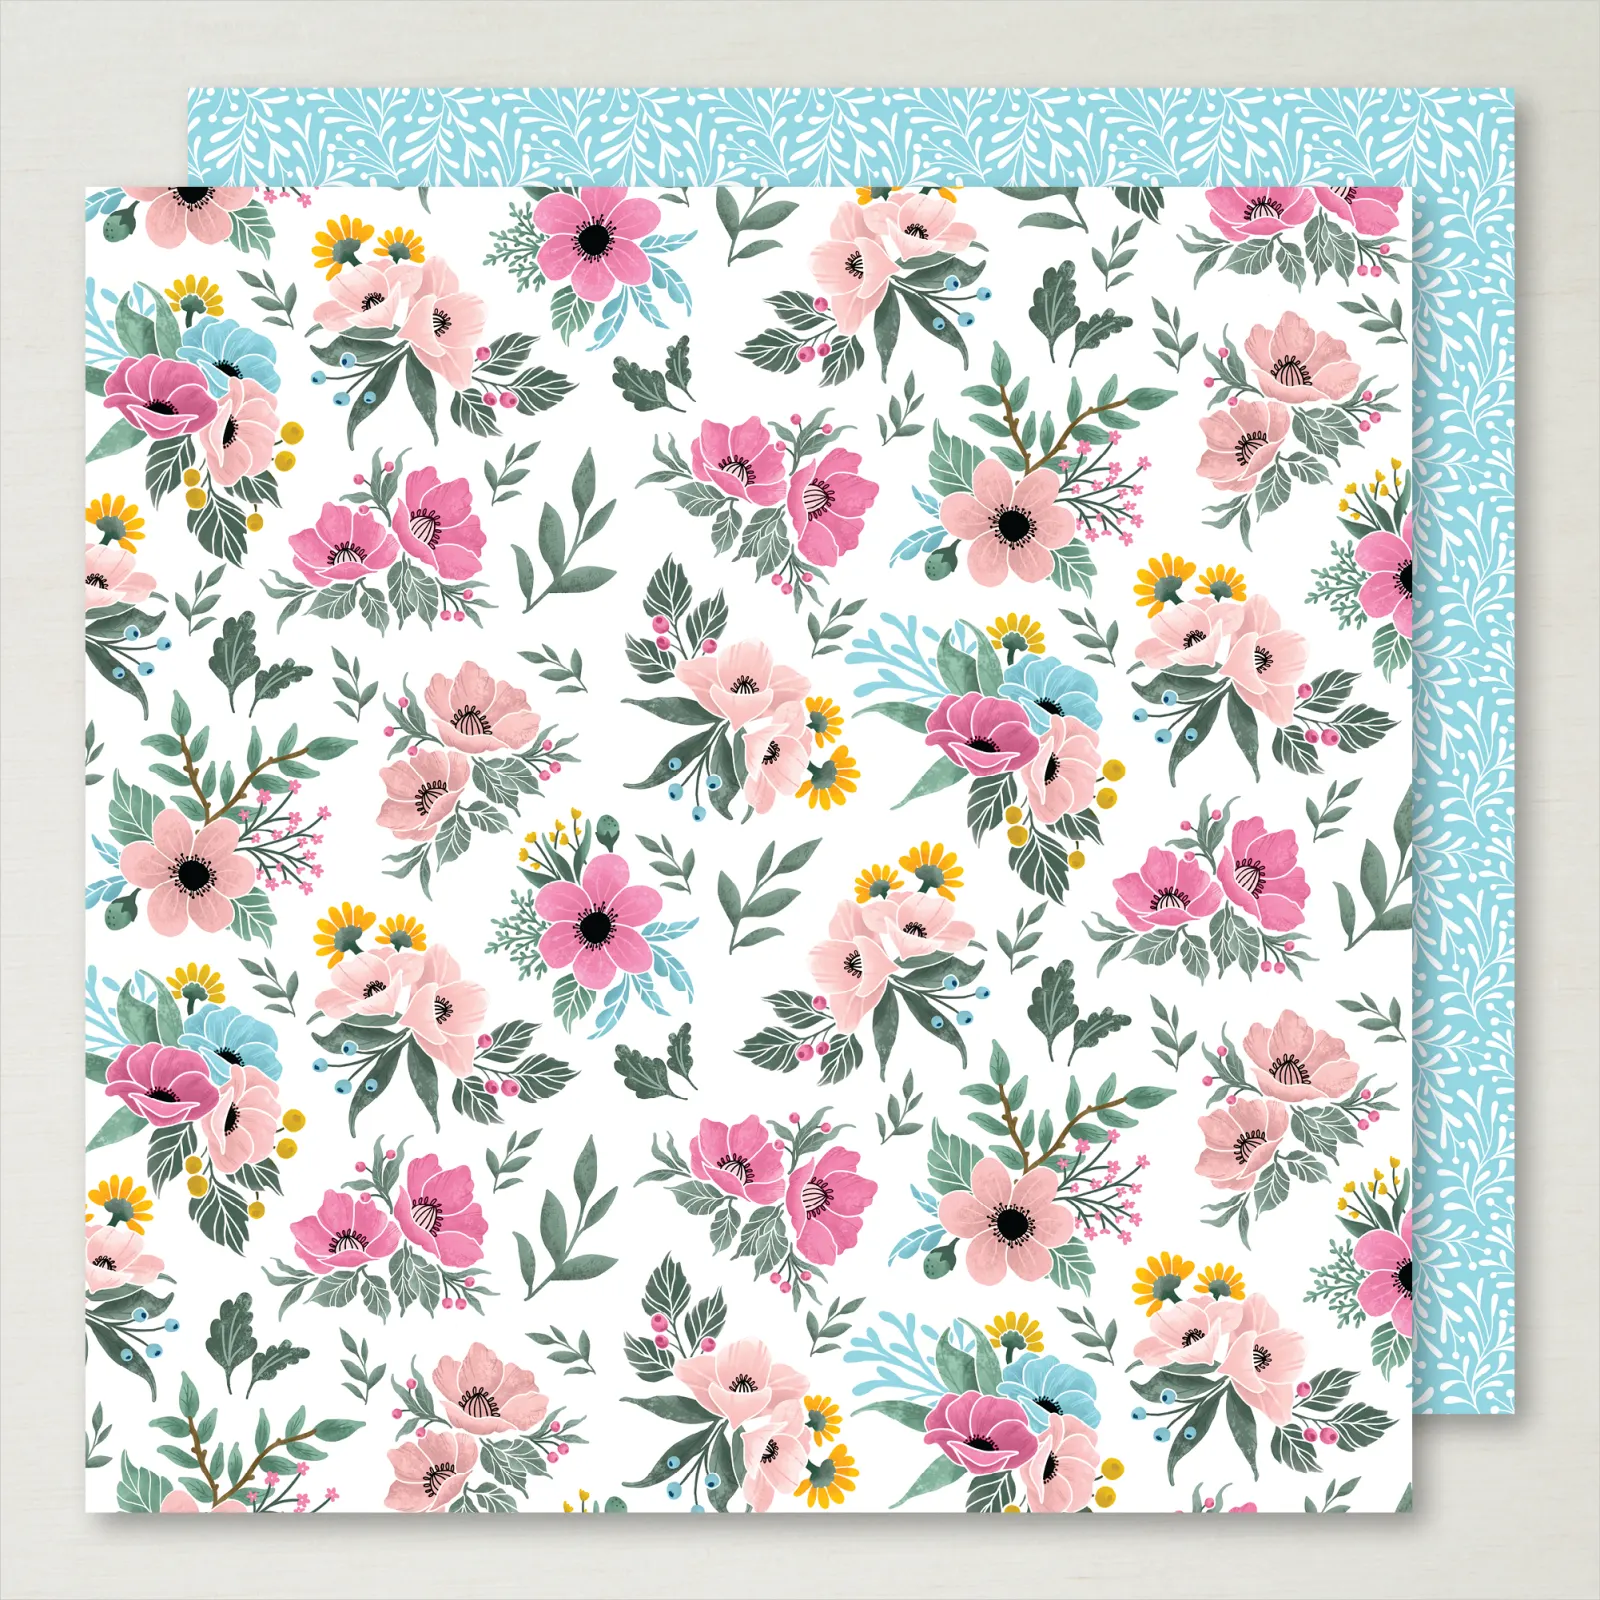
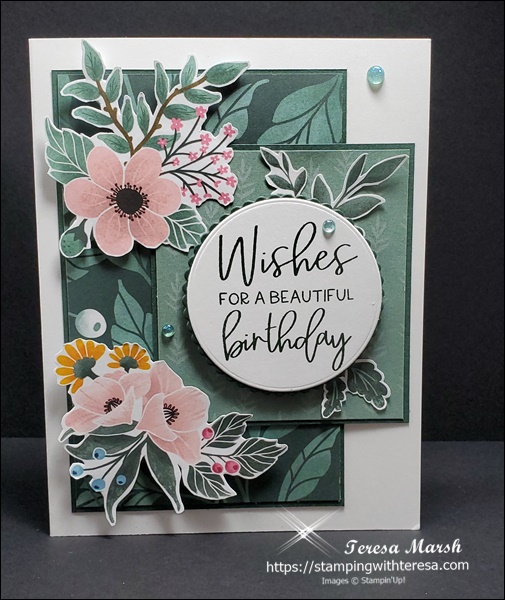
The Fitting Florets Designer Series Paper is just gorgeous! This paper coordinates with the Framed Florets stamp and die set just beautifully! In this project, they come together to make a beautiful birthday card.
The Problem
I face a design challenge each and every week. This week, I browsed through this beautiful paper, hoping for ideas. Firstly, I began to mull over all the ideas generated by this paper. One of the papers truly inspired me. Also, it contains some beautiful floral elements that match the dies. I had a flash of inspiration!
The solution
Acting on the inspiration, I deconstructed a floral sheet to have lots of decorative floral elements available for designing a card. To start off, I cut out the elements that matched a die. After that, I fussy cut other portions. Using my paper snips, I liberated greenery, larger floral elements and even some of the edge pieces. I ended up with a great selection of pretties for extra layering options.

The Process
A Basic White card base was the start for my card. Adding portions of the Fitting Florets Designer Series Paper backed by Evening Evergreen card stock was the next step. That gave me a fantastic base to experiment with those liberated pretties.
I took my time arranging and re-arranging different die-cut or fussy-cut elements to design the card front. I decided on the floral placements and lastly, I added some in-color opal rounds. Here’s a picture of the final product.

What do you think? Is it too fussy, not embellished enough, or somewhere in the middle? Let me know in the comments.
Oh! One more thing! I’d love to send you a .pdf tutorial for this project, but I need your email! Share your email below and I’ll send it right out to you.

