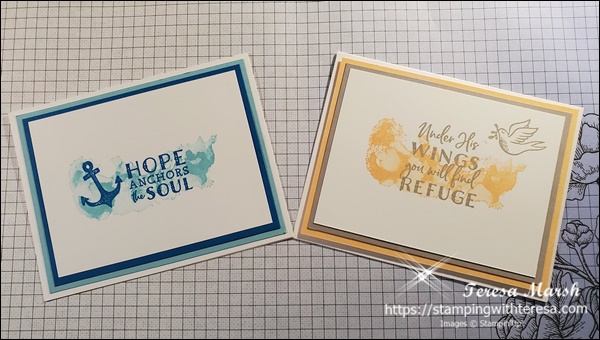
I absolutely love using the “Hope & Prayer” stamp set for simple encouragement cards!! The name of the person who inspired this design has escaped me, but I confess that I fell in love with the design’s simplicity. Though the original used a different background stamp where I utilized a stamp from the “Artistically Inked” set, my examples here are pretty much right on target with the sample I saw online.
If you’re like me, you have many occasions to let people know that they are in your thoughts and prayers. Having a cute card ready to share with them can be a real asset when we want to encourage them directly.
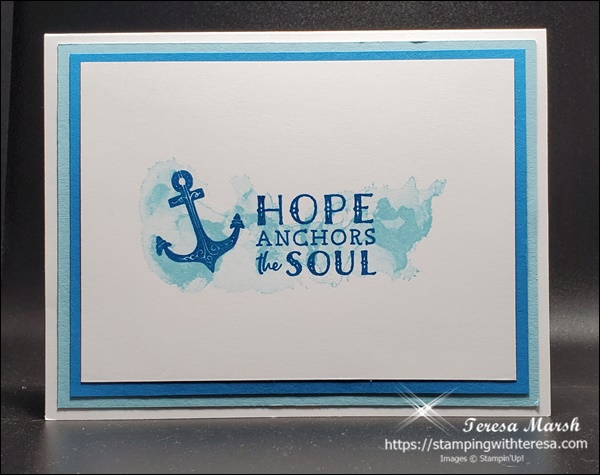
Steps to make this card
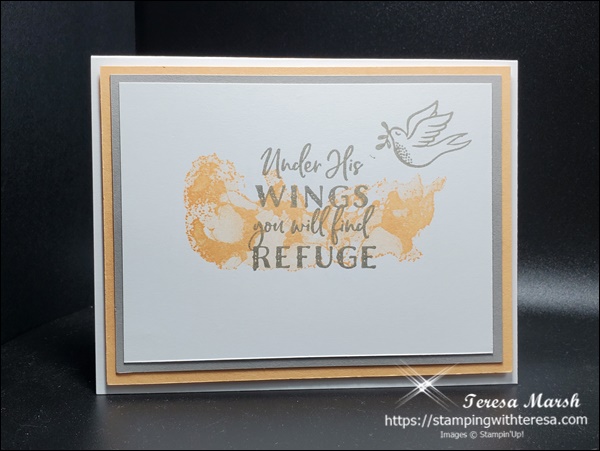
The card stock colors used in this example are Basic White, Balmy Blue (accent color), and Pacific Point (contrast color).
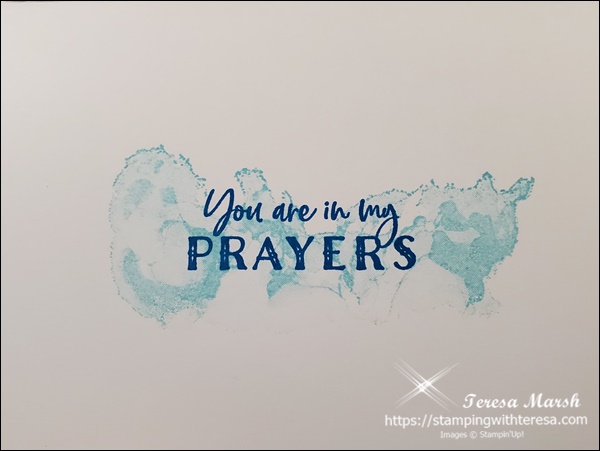
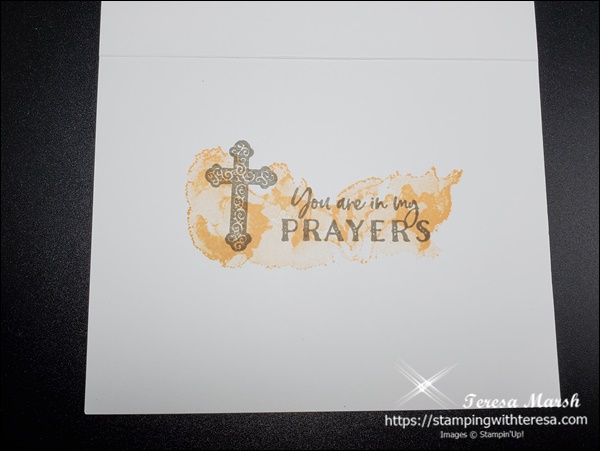
Create your card base with Basic White cut at 5-1/2 x 8-1/2 and scored in half at 4-1/4. Fold and burnish. Open the card and stamp the background stamp in your accent color and your chosen message in the contrast color.
Prepare your layers for the front: Basic White: cut a piece 3-1/2 x 4-3/4. Stamp the background stamp in your accent color, then stamp your sentiment (and anchor in this case) in the contrast color. Now, cut your other layers: the accent color piece (Balmy Blue) should be 4 x 5-1/4 while the contrast color (Pacific Point) needs to be cut at 3-3/4 x 5.
Attach your layers to the front of the card using glue or Stampin’ Seal – your preference – arranging them from largest on the base to smallest (white, stamped) on the top.
Here you can see the process on two cards with different color schemes but with the same design.
You can change the color scheme to an entirely different one, choose a different stamp for the front, but still make a quick and simple encouragement card.
When I was working on this second card, I decided to add a bit more decoration to the inner sentiment. What do you think? Is the inner portion nicer with or without the added cross?
These cards lend themselves to making multiple cards during a session. Cutting the layers and sorting them out, you can assemble quite a few of these in an hour or less.
Last but not least, use some of the icon stamps to dress up your envelopes to coordinate with the cards. This is a nice finishing touch that adds some extra pizazz to your encouragement card.
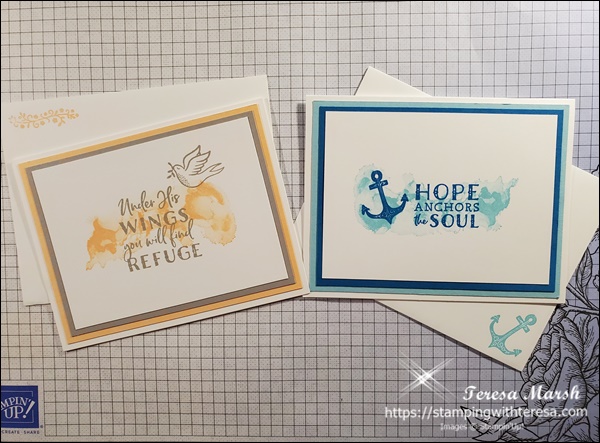
Do you think that just Paper, Ink and Stamps make a card that is pretty enough to send out to friends or family? Let me know in your comments what you would do differently, or what you’d like to add.
Be sure to follow me on the blog for more ideas and tips!
Products used
Best wishes to you all!! Teresa
