Overview
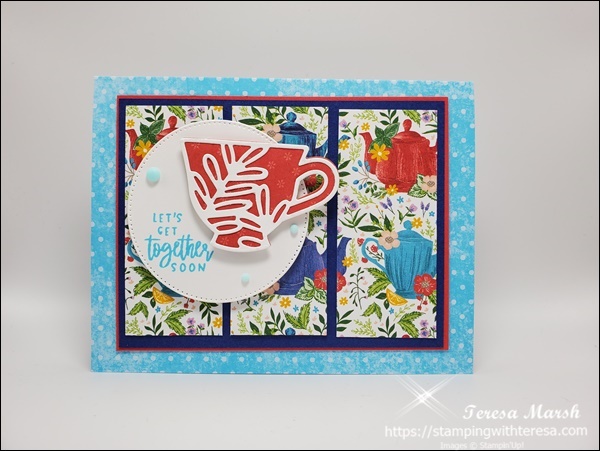
Today I chose to utilize the Tea Boutique Suite Cards and Envelopes in my card project along with the rest of the suite. Working from a card sketch, I cut a piece of the 6×6 paper into a 3 ¼ inch strip, then sliced off three sections 1 3/8 inches wide. I arranged them in order on a Starry Sky background (3 1/2 x 4 5/8 inches) and placed a last layer underneath of Sweet Sorbet card stock (3 5/8 x 4 6/8). This entire assembly was attached to one of the card bases from the pack. A white circle was used for the greeting and to back a teacup die cut.

Steps to make the card
- Choose a piece of the 6 x 6 Designer Series Paper (a directional print works great for this design); then cut a 3 ¼ inch strip on the horizontal of the print, then cut three strips at 1 3/8 inches from this in sequence.
- Cut your card stock:
- Starry Sky: 3 ½ x 4 5/8 inches
- Sweet Sorbet: 3 5/8 x 4 6/8 inches
- Die cut:
- Sweet Sorbet print:
- Teacup shape
- Basic White card stock:
- Teacup embellishment
- 2 ½ inch circle from Stylish Shapes Dies
- Sweet Sorbet print:
- Stamp the “Let’s get together soon” greeting in the lower left quadrant of the circle
- Assembly:
- Attach the 3 strips of Designer Series Print evenly on the Starry Sky card stock. Tape the Sweet Sorbet card stock underneath. Glue these to the card base.
- Glue the white teacup embellishment onto the base teacup shape; attach this to the white circle with dimensionals.
- Using dimensionals, place the assembled teacup/circle on the card base.
- Embellish with 2022-2024 In Color Matte Decorative Dots

And there you have it!
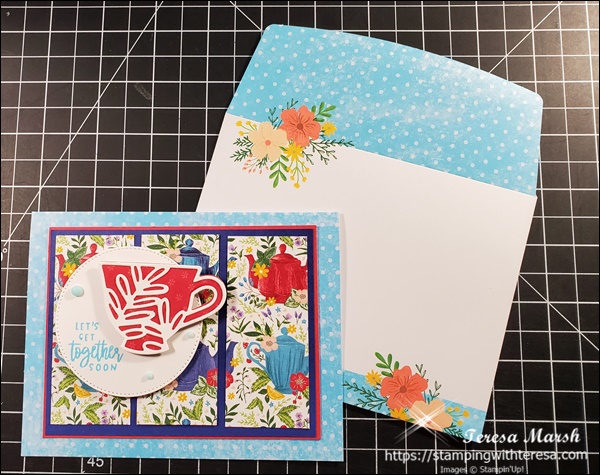
Choose the envelope that matches your chosen card base from the Tea Boutique cards and envelopes, and you’re ready to brighten someone’s day with some fresh and colorful snail mail!! It’s amazing how much difference it makes when we take the time to make and send a card. Texting is quick, but doesn’t convey the caring that a card does.
Be sure to follow the blog for new ideas every week.

